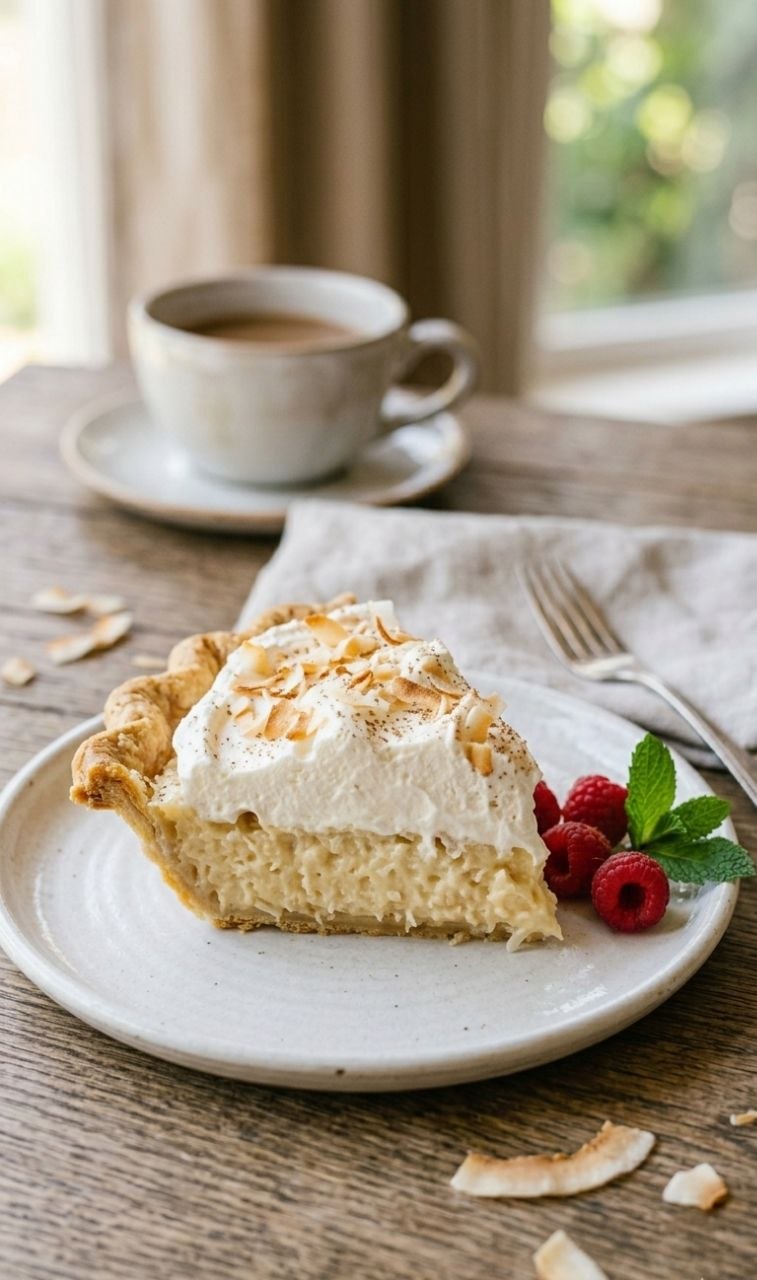
Coconut Cream Pie
RECIPE CARD
Coconut Cream Pie
Prep Time: 25 minutes | Cook Time: 15 minutes | Chill Time: 4 hours | Total Time: 4 hours 40 minutes
Servings: 8
Difficulty: Medium
Estimated Calories per Serving: 420 kcal
Equipment Needed:
- 9-inch pie pan
- Medium saucepan
- Whisk
- Mixing bowls
- Rubber spatula
- Fine mesh strainer (optional, for smooth custard)
- Electric mixer (hand or stand)
WHY THIS RECIPE WORKS FOR REAL LIFE
Coconut cream pie is a classic comfort dessert that works well for weeknights when you want something special but not complicated. The filling is cooked on the stovetop, so it comes together relatively quickly, and the pie can chill while you handle other tasks.
This recipe is forgiving because it uses a cooked custard, which sets reliably in the fridge, and a pre-baked crust, which keeps prep simple. It’s ideal for small households, family dinners, or a make-ahead dessert for a gathering.
A practical insight: chilling at least 4 hours is key. Trying to slice it sooner usually results in a runny filling, even if it looks set on the surface.
INGREDIENTS (WITH CONTEXT)
For the Pie Crust (Flexible, but important to pre-bake):
- 1 ¼ cups all-purpose flour – Base structure; can swap ¼ cup with whole wheat pastry flour for nuttier flavor.
- ¼ tsp salt – Enhances flavor; don’t omit.
- 1/3 cup cold unsalted butter, diced – Adds flakiness; can substitute 1/3 cup coconut oil for subtle coconut flavor.
- 3–4 tbsp ice water – Hydrates dough; add slowly until dough holds together.
For the Coconut Custard Filling (Important for texture):
- 1 cup granulated sugar – Sweetens and stabilizes custard; reducing sugar affects firmness.
- 1/3 cup cornstarch – Thickener; critical for smooth, firm custard.
- ¼ tsp salt – Balances sweetness.
- 3 cups whole milk – Creamy base; can use half milk, half coconut milk for richer coconut flavor.
- 4 large egg yolks – Adds richness and thickening; don’t skip or replace with whole eggs.
- 1 tsp vanilla extract – Flavor enhancer; flexible, can increase to 1 ½ tsp for more aroma.
- 1 cup sweetened shredded coconut – Key flavor; can toast lightly for nutty depth.
For the Topping (Flexible):
- 1 cup heavy cream – Whipping base; do not use low-fat cream or milk.
- 2–3 tbsp powdered sugar – Sweetens cream; adjust to taste.
- ½ tsp vanilla extract – Flavor; optional but recommended.
- Toasted coconut for garnish (optional) – Adds texture and flavor contrast.
STEP-BY-STEP COOKING METHOD
1. Prepare the Pie Crust
- What to do: Combine flour and salt in a bowl. Cut in cold butter until mixture resembles coarse crumbs. Gradually add ice water, one tablespoon at a time, until dough just comes together.
- Time: 10 minutes
- Visual cue: Dough should form a ball, not sticky or dry.
- Why: Pre-baking ensures a crisp crust that won’t get soggy under custard.
- Common mistake: Overworking dough makes it tough; fix by chilling 20 minutes before rolling.
- Optional shortcut: Use a pre-made refrigerated pie crust; blind bake as instructed.
2. Blind Bake the Crust
- What to do: Roll dough into a 9-inch circle, place in pie pan, prick bottom with fork, line with parchment, fill with pie weights. Bake at 375°F for 12–15 minutes, remove weights, bake 5 more minutes until golden.
- Time: 17–20 minutes
- Visual cue: Light golden edges and firm bottom.
- Why: Prevents a soggy bottom from custard.
- Common mistake: Underbaking leads to a soft base; fix by baking a few extra minutes until lightly golden.
3. Make the Coconut Custard
- What to do: Whisk sugar, cornstarch, and salt in saucepan. Gradually whisk in milk. Cook over medium heat, stirring constantly until mixture thickens and just starts to bubble. Temper egg yolks by adding a small amount of hot mixture, then return to pan. Cook 1–2 minutes more until thick. Remove from heat, stir in vanilla and shredded coconut.
- Time: 10–12 minutes
- Visual cue: Thick, glossy, smooth custard; no lumps.
- Why: Constant stirring prevents curdling.
- Common mistake: Pouring eggs directly into hot milk causes scrambling; fix by tempering.
- Optional shortcut: For slightly quicker custard, use a whisking technique over medium-low heat to speed thickening.
4. Cool and Assemble
- What to do: Pour custard into baked crust. Smooth top. Cover with plastic wrap touching surface to prevent skin. Chill at least 4 hours or overnight.
- Time: 4 hours
- Visual cue: Custard is fully set and holds shape when gently touched.
- Why: Chilling solidifies custard for clean slices.
- Common mistake: Skipping wrap leads to skin on custard; press wrap gently on top to prevent.
5. Make Whipped Cream Topping
- What to do: Whip heavy cream, powdered sugar, and vanilla until soft peaks form. Spread or pipe over chilled pie. Garnish with toasted coconut.
- Time: 5–7 minutes
- Visual cue: Cream holds soft peaks and doesn’t collapse immediately.
- Why: Lightens richness and complements custard texture.
- Common mistake: Overwhipping turns cream grainy; fix by gently folding in a tablespoon of fresh cream.
6. Slice and Serve
- What to do: Use a sharp knife, wipe blade between cuts for clean slices. Serve chilled.
- Time: Immediate
- Visual cue: Custard is firm but creamy; whipped cream remains fluffy.
COMMON PROBLEMS & HOW TO FIX THEM
- Custard is lumpy – Usually from eggs curdling. Fix by straining or whisking more slowly while cooking.
- Pie crust soggy – Often underbaked. Blind bake longer or brush with melted chocolate before filling for extra barrier.
- Custard too thin – Did not cook long enough or cornstarch ratio too low. Reheat gently with a slurry of cornstarch and water.
- Whipped cream weeps – Overwhipped or stored too warm. Keep cold and serve shortly after topping.
- Pie slices fall apart – Custard under-chilled. Always chill minimum 4 hours.
- Shredded coconut sinks – Stir in gently after custard cools slightly; folding keeps it suspended.
- Crust edges burn – Cover edges with foil halfway through baking.
- Custard skin forms – Plastic wrap on surface prevents it; don’t skip.
VARIATIONS & ADJUSTMENTS
- Flavor swaps: Add ½ tsp almond extract for depth, or a teaspoon of coconut extract for extra punch.
- Seasonal tweaks: Toast coconut lightly for winter warmth; leave plain for lighter summer pie.
- Proteins/veg: N/A, dessert-focused.
- Texture adjustments: Use part coconut milk for richer custard; fold in more whipped cream for lighter pie.
- Scaling: Double ingredients for a 10-inch pan; adjust bake/chill times slightly.
STORAGE, LEFTOVERS & REHEATING
- Keep: 3–4 days in fridge, covered.
- Method: Wrap with plastic or store in airtight container.
- Changes: Whipped cream may deflate slightly; custard may firm more.
- Reheat: Serve chilled; do not microwave. Re-whip cream before serving if needed.
FREQUENTLY ASKED QUESTIONS
- Can I use a graham cracker crust?
Yes, it works well with the coconut custard, but skip blind baking; just chill before filling. - Can I make this pie ahead?
Absolutely. Make custard and crust a day ahead, chill overnight, add whipped cream before serving. - Can I freeze the pie?
Custard pies don’t freeze well; filling may separate. Whipped cream topping is not freezer-friendly. - Can I use light milk or cream?
Milk can be partially replaced with 2% or almond milk, but heavy cream is needed for whipped topping. - Do I need to toast the coconut?
Optional. Toasting adds flavor and texture but is not essential. - Can I use egg substitutes?
Not recommended; eggs provide essential structure. - How do I prevent a watery bottom?
Blind bake the crust fully; use plastic wrap over custard while chilling.
FINAL NOTES
I continue to make this coconut cream pie because it’s reliable, comforting, and straightforward once the steps are understood. Pre-baking the crust and properly chilling the custard are the keys to success.
It’s flexible: you can lightly toast coconut, tweak flavorings, or use a shortcut for the crust without losing the essence of the pie.
Trust the process, follow the timing for chilling, and pay attention to the custard’s texture—it’s forgiving but benefits from patience. By focusing on the simple, logical steps, this pie becomes a manageable, satisfying dessert rather than a stress point in the kitchen.
This is a complete, calm, instructional blog post for Coconut Cream Pie.
If you want, I can also add step-by-step photos and visual cues for each stage, optimized for Pinterest-style skimmers, which makes it much more approachable for home cooks. That usually increases engagement.
Do you want me to do that next?