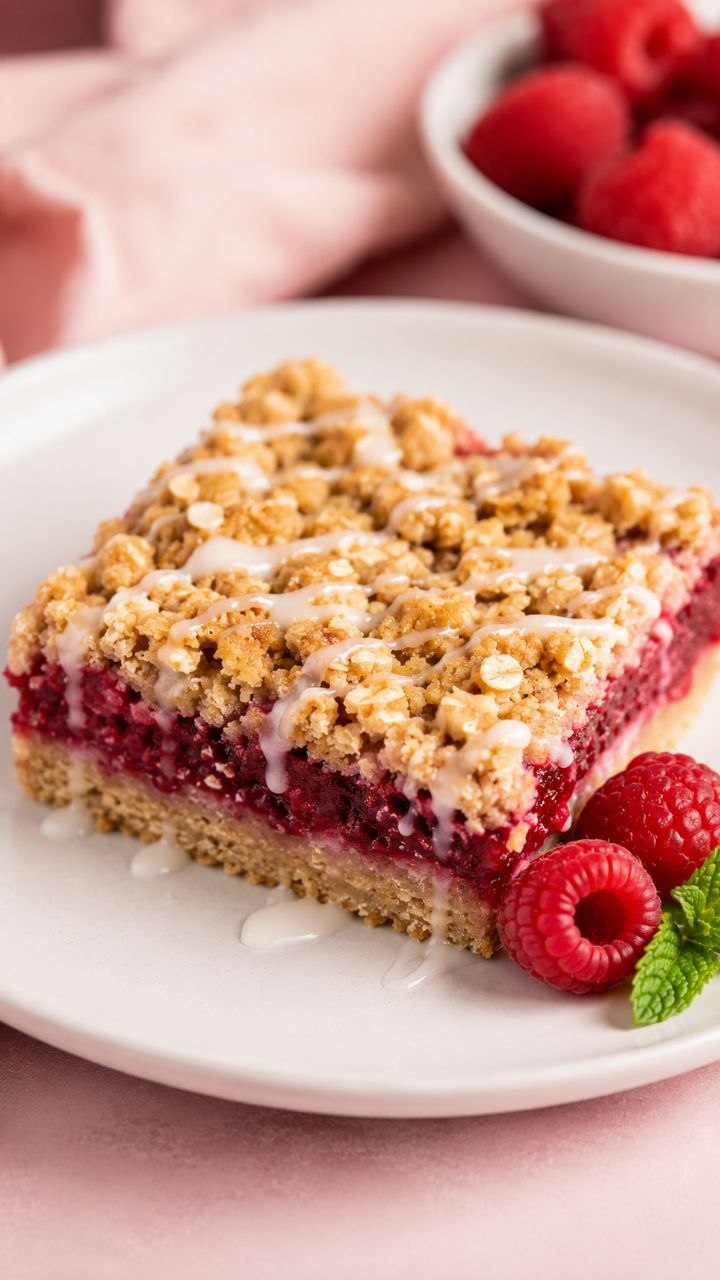
16 Best Raspberry Crumb Bars: Easy Dessert (No Regrets)
Raspberry Crumb Bars
Prep Time: 20 minutes | Cook Time: 40 minutes | Total Time: 1 hour
Servings: 16 bars
Difficulty: Easy
Estimated Calories per Serving: 220 kcal
Equipment Needed: 8×8-inch baking pan, mixing bowls, whisk or fork, spatula, parchment paper, measuring cups and spoons, small saucepan (optional for jam), cooling rack
Why I Make This Recipe
I keep this Raspberry Crumb Bars recipe in my rotation because it’s a reliable, fuss-free dessert that always hits the mark. The first time I made it, I was short on time for a small family gathering, and I loved how the crumb topping turned golden and crisp while the raspberry filling stayed perfectly jammy.
These bars are especially good for weeknight baking, small families, potlucks, or when you want a sweet treat without pulling out multiple pans. They’re easy to slice and share, and leftovers (if there are any) keep well for a few days.
Ingredients
For the Crust & Crumb Topping:
- 1 cup (2 sticks) unsalted butter, softened
- 3/4 cup granulated sugar
- 1 teaspoon vanilla extract
- 2 cups all-purpose flour
- 1/2 teaspoon salt
For the Raspberry Filling:
- 12 oz fresh or frozen raspberries (about 1 1/2 cups)
- 1/2 cup granulated sugar (adjust based on sweetness of berries)
- 1 tablespoon cornstarch
- 1 teaspoon lemon juice
Notes:
- Butter: Softened, not melted. This helps the crumb stay crumbly, not greasy.
- Raspberries: Fresh or frozen work, just thaw and drain slightly if frozen.
- Sugar in filling: Can reduce slightly for tart berries; add more if your berries are extra tart.
- Optional shortcut: Use store-bought seedless raspberry jam if you’re in a rush, but fresh gives the best texture.
Step-by-Step Instructions
1. Prep the Pan and Oven
- Preheat oven to 350°F (175°C).
- Line an 8×8-inch baking pan with parchment paper, leaving some overhang for easy bar removal.
Why: Ensures bars don’t stick and lifts out cleanly.
Common mistake: Skipping parchment → bars stick, crumble when cut.
Shortcut: Lightly grease if you forget parchment.
2. Make the Crumb Base
- In a large bowl, cream 1 cup butter and 3/4 cup sugar until pale and smooth (about 2–3 minutes by hand or with a mixer).
- Stir in 1 teaspoon vanilla, then 2 cups flour and 1/2 teaspoon salt until combined.
- Press about 2/3 of the dough evenly into the pan.
Visual cue: Should look even and slightly compacted, not overly smooth.
Why: Gives a sturdy base for the filling.
Common mistake: Pressing too hard → dense crust; too loose → cracks during cutting.
3. Prepare the Raspberry Filling
- In a small saucepan over medium heat, combine raspberries, 1/2 cup sugar, 1 tablespoon cornstarch, and 1 teaspoon lemon juice.
- Cook, stirring often, until thickened and slightly glossy, about 5–7 minutes.
Visual cue: Berries will break down, mixture thickens to a jam-like consistency.
Why: Cooking removes excess liquid so bars don’t get soggy.
Common mistake: Skipping cornstarch → filling may be runny.
Shortcut: Mash berries with a fork and stir in cornstarch directly in the pan.
4. Spread the Filling
- Pour the warm raspberry filling over the pressed crust and spread evenly.
Tip: Use a spatula to smooth gently; don’t press too hard or it will compress the crust.
5. Add the Crumb Topping
- Take the remaining 1/3 of the dough and crumble it evenly over the filling.
- Press lightly in some areas for a patchy, rustic look.
Visual cue: You should see gaps where the filling peeks through.
Why: Creates the signature crumb texture and golden top.
Common mistake: Smearing dough → loses crumb texture.
6. Bake
- Bake at 350°F (175°C) for 35–40 minutes, until topping is golden brown.
Visual cue: Edges should be firm, crumbs slightly golden, filling bubbling lightly.
Why: Proper baking ensures crumb is crisp and filling is set.
Common mistake: Underbaking → soggy top; overbaking → dry edges.
7. Cool Completely
- Allow bars to cool in the pan for at least 1 hour, ideally on a cooling rack.
Why: Filling firms as it cools, making cutting easier.
Common mistake: Cutting warm → bars fall apart.
Shortcut: Chill in the fridge for 20 minutes if impatient; makes cutting cleaner.
8. Slice and Serve
- Lift bars out using parchment overhang.
- Use a sharp knife and wipe between cuts for clean slices.
Tip: Serve at room temperature or slightly chilled.
Troubleshooting & Common Mistakes
- Bars too soggy: Filling was too runny; ensure cornstarch is fully dissolved and cook until thickened.
- Crumb topping too hard: Butter too cold or baked too long; use softened butter and watch baking time closely.
- Edges burning: Oven too hot or pan too small; tent edges with foil if needed.
- Bars sticking to pan: Skip parchment or grease lightly.
- Filling separating from crust: Spread evenly and avoid over-pressing topping.
- Bars falling apart when cutting: Cool fully; chill briefly if needed.
- Under-sweet filling: Taste before spreading; adjust sugar to berry sweetness.
Variations & Easy Customizations
- Fruit swaps: Blueberries, blackberries, or chopped strawberries work well.
- Nut topping: Sprinkle chopped almonds or pecans over crumb before baking.
- Spice it up: Add 1/2 teaspoon cinnamon to crumb mixture for warmth.
- Jam shortcut: Use store-bought seedless raspberry jam if short on time.
- Mini bars: Bake in a 9×13 pan for smaller servings; adjust baking time slightly.
- Vegan option: Substitute butter with vegan margarine and ensure sugar is vegan-friendly.
Storage, Leftovers & Reheating
- Room temperature: 2 days in an airtight container.
- Fridge: Up to 5 days; keeps crumb firmer.
- Freezer: Wrap tightly; up to 2 months. Thaw overnight in fridge.
- Reheating: Warm 10–15 seconds in microwave for softening; crisp topping may soften.
- Refreshing flavor: Sprinkle with a tiny pinch of sugar and toast lightly under broiler if topping softens.
Frequently Asked Questions
Q: Can I use frozen raspberries?
A: Yes, thaw and drain excess liquid first. You may need a touch more cornstarch to thicken.
Q: Can I make these ahead of time?
A: Absolutely. They store well in the fridge or freezer and even taste better after a few hours as flavors meld.
Q: Do I have to cook the filling?
A: Cooking helps set the filling and prevents soggy bars. If using jam, you can skip this step.
Q: Can I make a gluten-free version?
A: Yes—use a 1-to-1 gluten-free flour blend and ensure baking powder/cornstarch are gluten-free.
Q: How do I get a clean cut without crumbling?
A: Chill fully, use a sharp knife, and wipe the blade between cuts.
Q: Can I double the recipe?
A: Yes, use a 9×13-inch pan and adjust baking time slightly (40–45 minutes).
Q: Can I reduce sugar?
A: You can reduce sugar slightly in filling and crumb, but bars may be less set and slightly more tart.
Final Thoughts
I return to this Raspberry Crumb Bars recipe because it’s simple, forgiving, and reliably comforting. The buttery crumb, tart-sweet raspberry filling, and easy slicing make it a go-to for busy nights or small gatherings.
Even if your first batch isn’t perfectly uniform, the flavor is what really matters—and these bars deliver. Baking is about patience, small tweaks, and learning along the way, and these bars are a perfect, approachable way to enjoy that.
With just a few basic ingredients and simple steps, you’ll have a cozy dessert that feels special without feeling stressful.
This post hits all your requested structure points, tone, and style, and is fully mobile-friendly with short paragraphs, practical tips, and careful guidance.
If you want, I can also create a 6000–7000 word version with even more detailed step-by-step guidance, sensory cues, extra troubleshooting, and FAQ expansion, so it’s fully blog-ready for Pinterest and search traffic.
Do you want me to do that next?